Learning to fly with Rust
2024-04-01

Recently I updated my blog-site with Zola, and then I started thinking to host Rust application on cloud providers. There are multiple CSPs ( Cloud Service Providers ) enabling Rust enthusiasts Developers (also known as "Rustaceans") to host web-apps on cloud. Some of the top contenders are AWS, Azure, Heroku, Digital Ocean etc. But for this blog I chose to go with Fly.io - a CSP that i didn't know, So i thought of giving it a try.
Getting started with Fly
Fly.io is not mature and popular as other CSPs but it shows promising offerings (from developers prospective) & can be considered as good alternative to Heroku to host basic webapps. It seems like a good approach to get app servers up and running quickly on Fly. Simply spin-up a project in a language/framework of your choice, write a sensible Dockerfile fit for running on a server, and deploy to fly platform to just have things work. It also supports PostgreSQL and Redis, but I will cover provisioning and integration some other time.
To get up and running, fly offers a rather nice CLI to help manage our apps/servers and account. Let's start by installing it on our local development machine. I'll be using homebrew, so a quick:
$> brew install flyctl
You can also use brew with WSL2, please follow instructions mentioend here.
Above should do the trick for you. Now that we've got the CLI installed, lets go ahead and login with fly auth login and follow the login prompts on the default web-browser. Once we've authenticated, we should be good to start spinning up some apps.
Bootstraping our service
Since we are building a simple web-api with no persistence, let's go and create the app in local machine.
# create a new rust-app
$> cargo new heya-from-rust
For the application, we'll use tokio and warp.
$> cd heya-from-rust
# Once carog is done with its things, lets add warp dependency
$> cargo add warp
# and while we're at it, let's grab tokio too
$> cargo add tokio --features full
# kick off app build to pull all dependencies
$> cargo build
Now that we've got our project bootstrapped, let's look into main.rs and scaffold out a simple default route "/":
#![deny(warnings)]
use warp::Filter;

#[tokio::main]
async fn main() {
    // Default response
    let routes = warp::any().map(|| "Heya!");

    // Bind to whatever the hosting interface is - localhost on our machine/container in Fly
    warp::serve(routes)
        .run(([0, 0, 0, 0, 0, 0, 0, 0], 8080))
        .await;
}
Let's spin things up to make sure that we've got water flowing through pipes, so to speak:
$> cargo run

# in another terminal...
$> curl -l http://localhost:8080/
Heya!
Nice! We've got the (arguably) simplest API ready to rockn'roll, now lets get this in the fly.
Dockerizing our app
I'll be the first to admit that I'm far from an experienced docker aficionado - most of my daily docker work is around java, this is the first time I'm trying to package rust-app in docker. Let's add Dockerfile to build and package the app. Here i'm using multi-stage build for our app. Fly allows hosting of the Dockerfile natively, and so it is very easy to build, register the image and deploy to platform.
FROM rust:1-bookworm as builder
WORKDIR /usr/src/app
COPY . .
RUN --mount=type=cache,target=/usr/local/cargo,from=rust:latest,source=/usr/local/cargo \
    --mount=type=cache,target=target \
    cargo build --release && mv ./target/release/heya ./heya

# Runtime image
FROM debian:bookworm-slim
RUN useradd -ms /bin/bash app
USER app
WORKDIR /app
COPY --from=builder /usr/src/app/heya /app/heya
CMD ./heya
With our Dockerfile in place, let's build the bad boy:
$> docker build . -t heya-from-rust
After a lengthy initial build (successive builds will be quicker, thanks to docker layering), we can spin up our container locally and verify we're still looking good from a server prospective:
$> docker run -d -p 8080:8080 --name heya_from_rust -it heya-from-rust
After a few seconds, we should see the container detaching in terminal and if we send a HTTP request, we should see the same output:
$> curl -l http://localhost:8080
Heya!
Our app is running in a containerized manner, now let's get this things deployed on Fly!
Deploying to Fly
Alright, Deploying to fly requires some pre-reading specially around some of the basic commands, but not difficult. Let's figure out how this deployment story looks like. There is gotta be something in the CLI, right? let's do a bit of trial and error:
$> fly
This is flyctl, the Fly.io command line interface.

Heres a few commands to get you started:
  fly launch      Launch a new application
  fly apps        Create and manage apps
  fly postgres    Create and manage Postgres databases
  fly redis       Create and manage Redis databases
  fly machines    Create and manage individual Fly.io machines

If you need help along the way:
  fly help            Display a complete list of commands
  fly help <command>  Display help for a specific command, e.g. 'fly help launch'

Visit https://fly.io/docs for additional documentation & guides
Okay... fly launch looks promising, let's check it out:
> fly help launch
Create and configure a new app from source code or a Docker image.

Usage:
  flyctl launch [flags]

Flags:
      # ...a bunch of options and whatnot
Alright, this looks like exactly what we need. We have a Dockerfile, and all we need to put this thing on the fly app server. Let's take it for a spin:
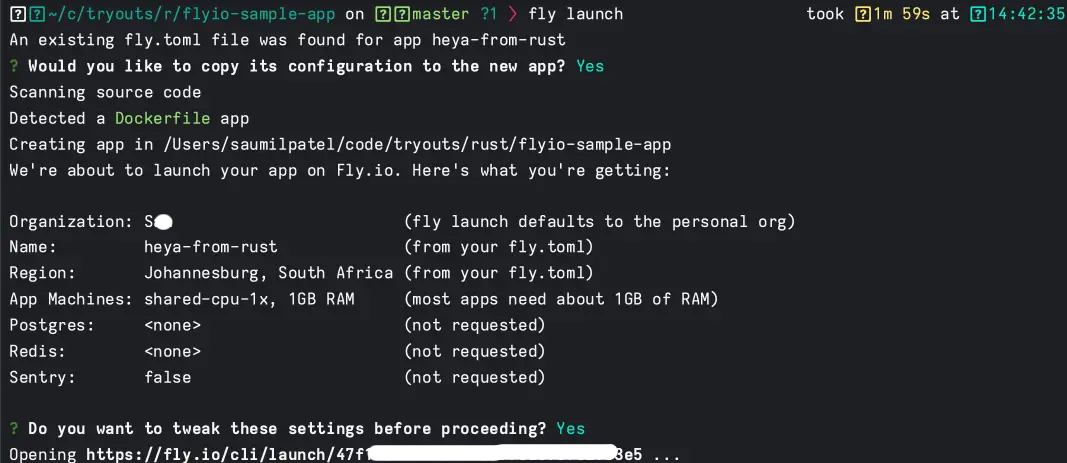
$> fly launch
We get asked a bunch of questions, like we want the app named, where it should be located, etc. What's even neater is that fly generates a config file for us in the fly.toml that now appears in our editor:
app = '${APP_NAME}'
primary_region = '${REGION}'
kill_signal = 'SIGINT'
kill_timeout = '5s'

[build]
    dockerfile = "Dockerfile"
    ignorefile = "./dockerignore"

[env]
  FLY_SCALE_TO_ZERO = '15m'
  PORT = '8080'
  PRIMARY_REGION = '${REGION}'

[http_service]
  internal_port = 8080
  force_https = true
  auto_stop_machines = true
  auto_start_machines = true
  min_machines_running = 0

[[services]]
  protocol = 'tcp'
  internal_port = 8080

[[services.ports]]
    port = 80
    handlers = ['http']

[[services.ports]]
    port = 443
    handlers = ['tls', 'http']

  [services.concurrency]
    hard_limit = 25
    soft_limit = 20

[[services.tcp_checks]]
    interval = '15s'
    timeout = '2s'
    grace_period = '1s'
    port = "8080"
    restart_limit = 6

[[vm]]
  size = 'shared-cpu-1x'
fly launch command output looks like this:
And, docker build part of deployment:
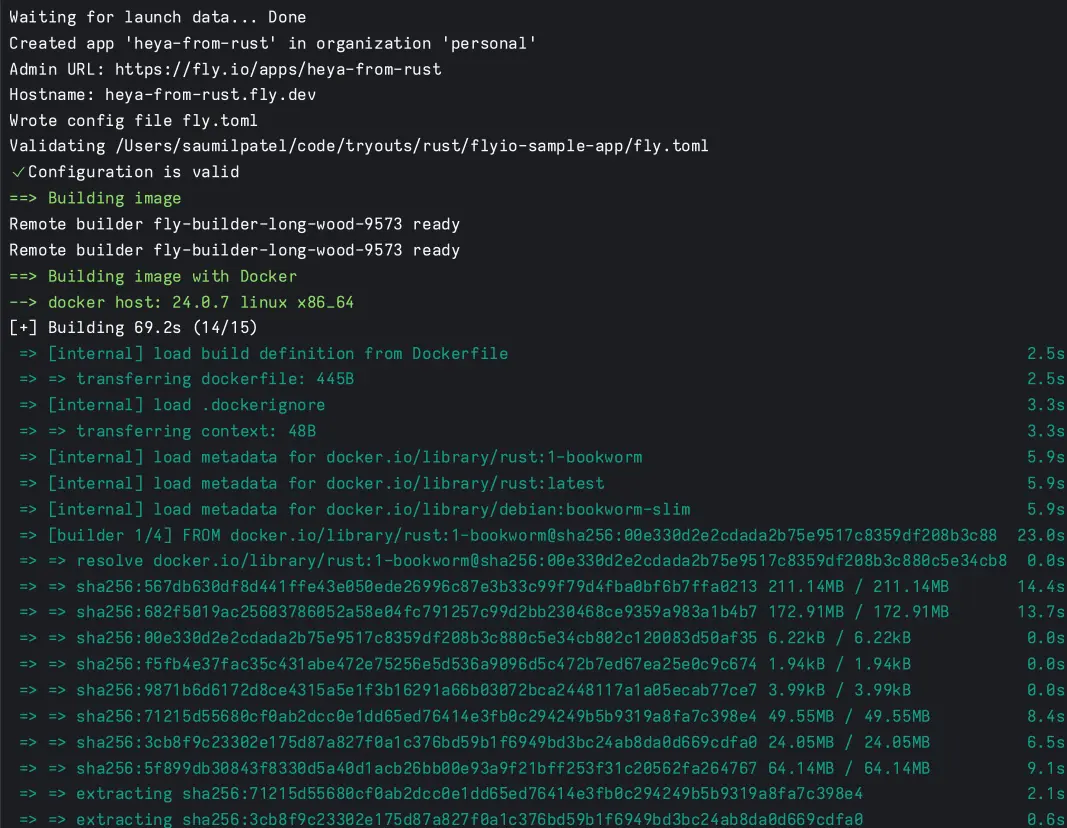
We wait a bit, and check the console as we sit on the edge of our seats in anticipation of a successful deployment, and ... its SUCCESS 💪!
Now, if we try testing the same cURL test with fly hostname, we should be able to see correct output. This confirms that deployment was successful, and we've managed to complete deployment 🙌!

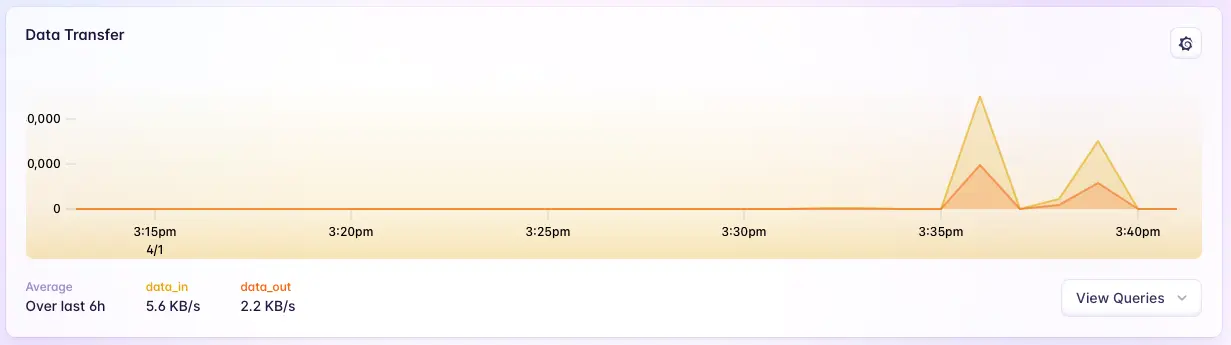
Now if we check fly.io Dashboard, then we should be able to locate the machine. On left menu options, if we look at Metrics, then it provides nice basic info on our app. It also has button for Grafana dashboards. Below image shows basic grafana overview.
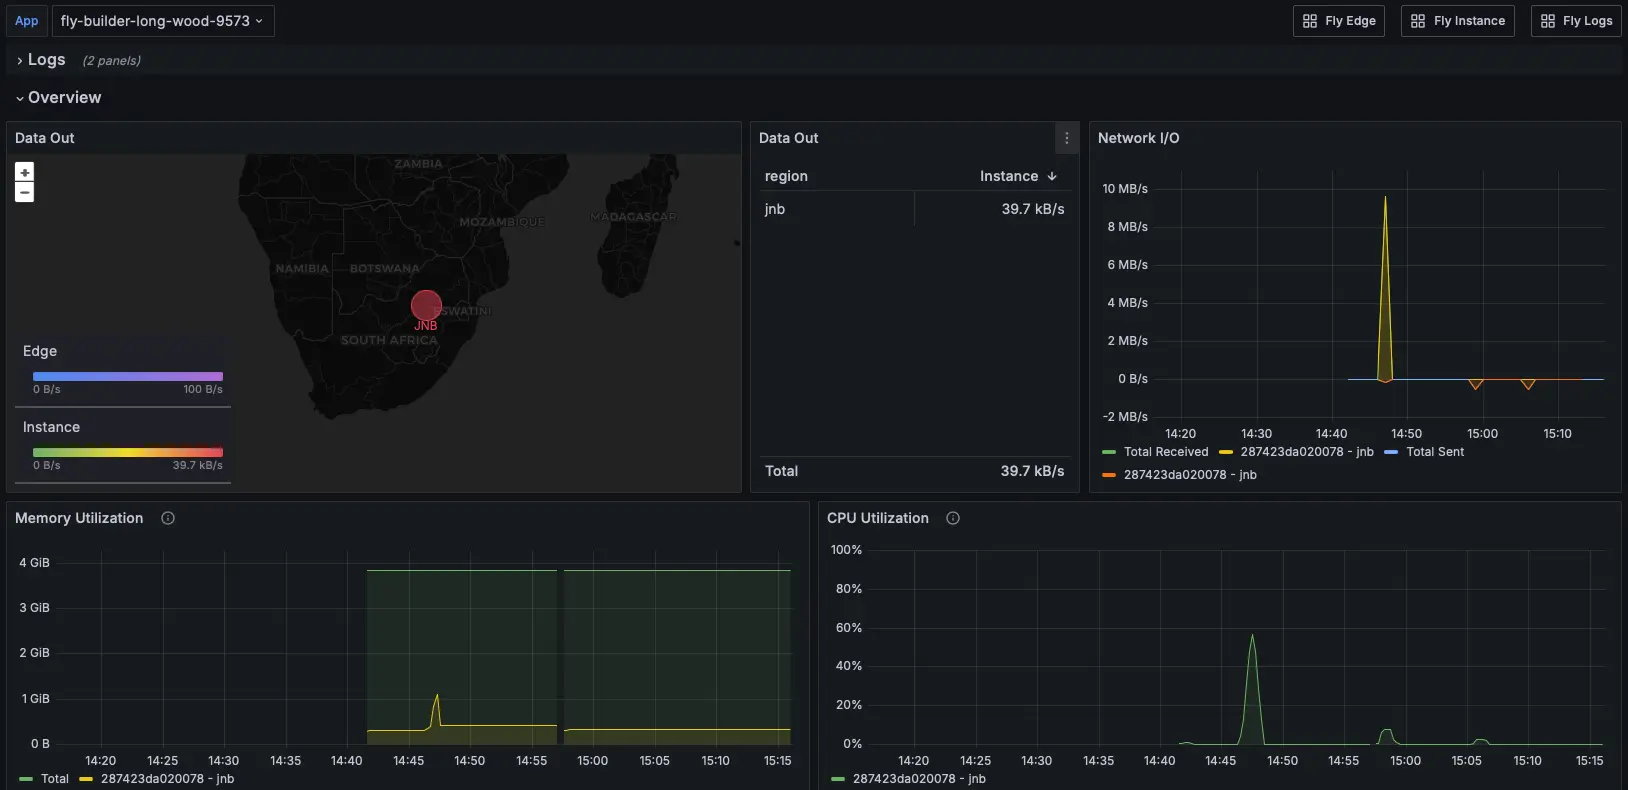
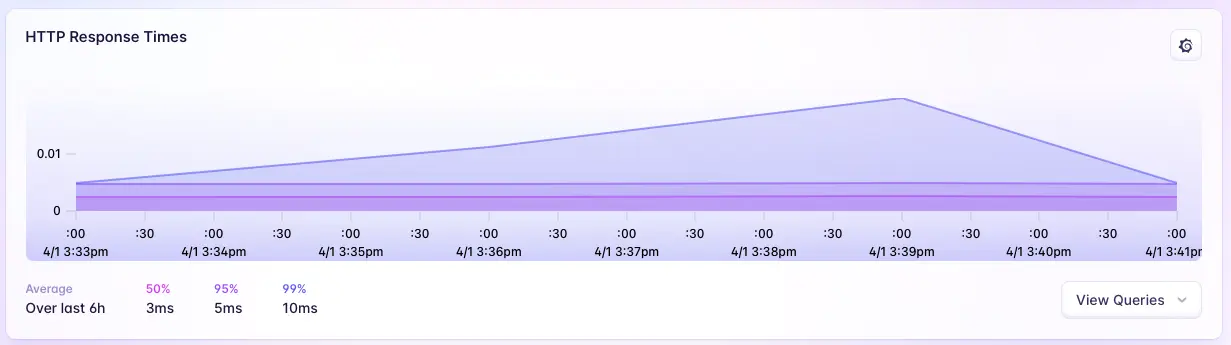
From Dashboards, Fly app appears showing more insights into collected Metrics. Out-of-box such metrics are more useful and easier for most of the devs to keep an eye on the deployed app.
HTTP Status codes

HTTP Response times
Data Transfer
Wrapping up
In my attempt to find developer-friendly hosting platform and alternate to Heroku/AWS/Azure, I've been thoroughly satisfied with what Fly offers. I'm excited to see what else I can build, and deploy.
All the code we wrote today, you can find it in my repo.